| atk > documentation > how to use the atk | Last update: 2004/09/18 by Marc Ruef |
How to use the ATK
This small introduction shows in five steps how to use the ATK.
Step 1 - Configuration
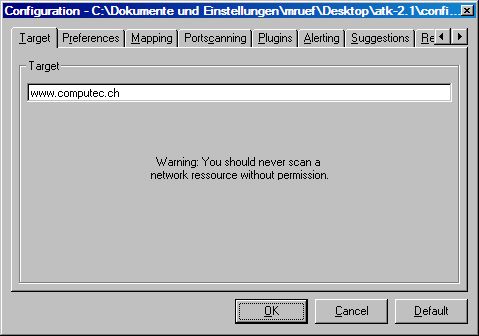
After starting the ATK by running the exe file you can see the main frame. If you have never started or configured the ATK, the default configuration is used. Before you can do your specific scans, you have to edit the running configuration by pressing the config button in the toolbar.
You are able to change the behavior of the whole ATK software. Very important is for example specifying the target system. You can do this by either selecting a host name or IP address. Other things as like doing denial of service attacks, using mapping to determine the target or the definition of the directories of plugins and suggestions can also be made. Take a few minutes to check all possibilities to get the most efficient configuration for your penetration test.
Afterwards you can apply the new configuration by pressing the OK button. The individual configuration will be saved and also used the next time you are running the ATK. Pressing the cancel button drops your changes and the default button resets the whole configuration.
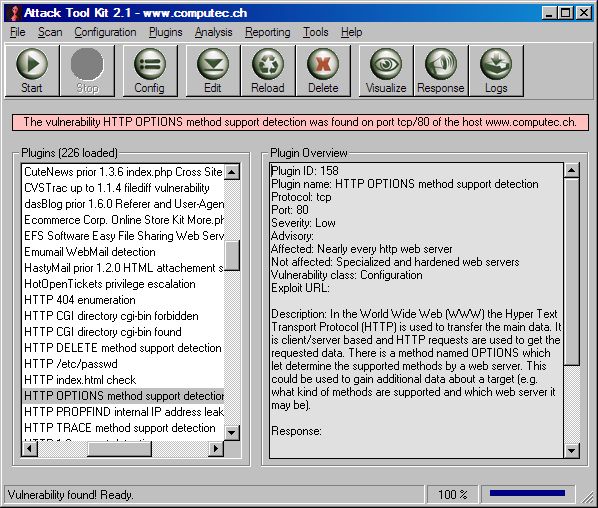
Step 2 - Selecting a plugin
When you are in the main frame you are able to select a plugin by clicking one of the nodes in the left treeview. The plugin will be loaded into the memory and the fields are shown in the right textbox.
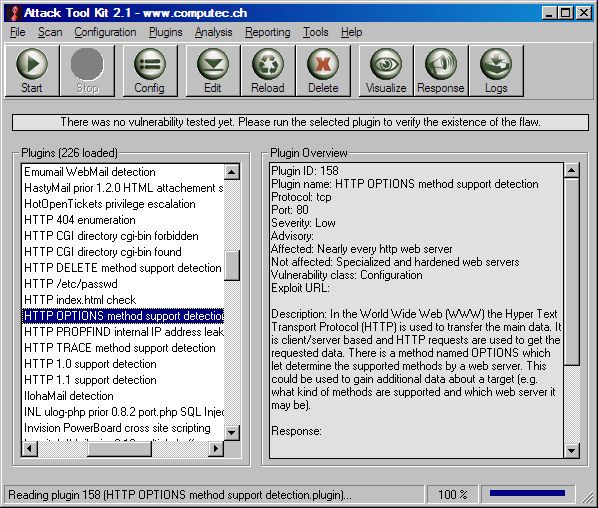
If you are looking for a specific check or don't know what a plugin is for, you can browsing thru the different sortings of the treeview. This includes ATK plugin IDs, check names, port numbers, severity, CVE names, Nessus plugin IDs and many more.
Step 3 - Preparing the scan
If you have configured your ATK and selected a specific scan, you may want to prepare the tool for the attack. If you select edit in the toolbar you are able to open the internal plugin editor. There you are able to see and edit every field in the plugin. This includes also the attack procedure so you are able to create your own and individual attacks.
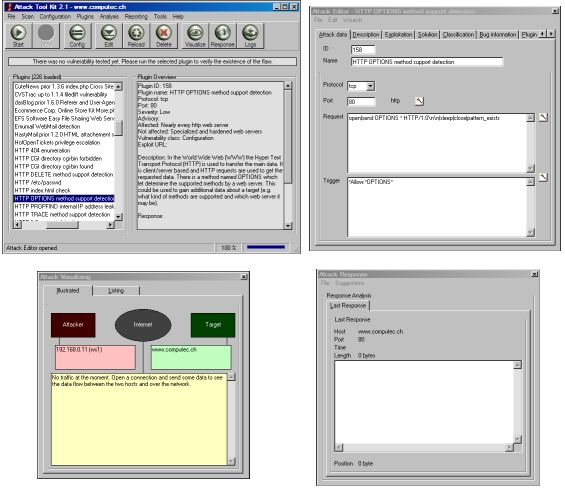
The attack visualizing later shows the running attack in real-time and the attack response allows to do a response analysis of the finished check.
Step 4 - Running the attack
If your scan has been prepared, you can start the attack by pressing the start button. It will take a few seconds to run the attack and to compute the results of the scan attempt. If the scan is finished, the ATK will show the existence or non-existence of the checked flaw. If the vulnerability was found, a red textbox will appear - If the vulnerability couldn't be found, a green textbox will appear.
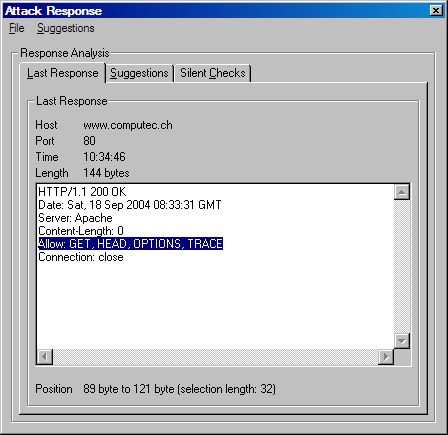
Step 5 - Analyzing the results
If you click on this textbox after the scan is finished, the attack response window will open so a further analysis of the response can be done. False positives or negatives could be determined and further investigations for individual checks can be done. There are also suggestions for further analysis and attacks given. The silent checks - if activated - determine other plugins that would perhaps also detect the existence of potential flaws without touching the target.